

Notifications
Configuration → Notifications has four tabs: Email Settings, Actionable Emails, Teams Notifications, and Templates.
Email Settings
Section titled “Email Settings”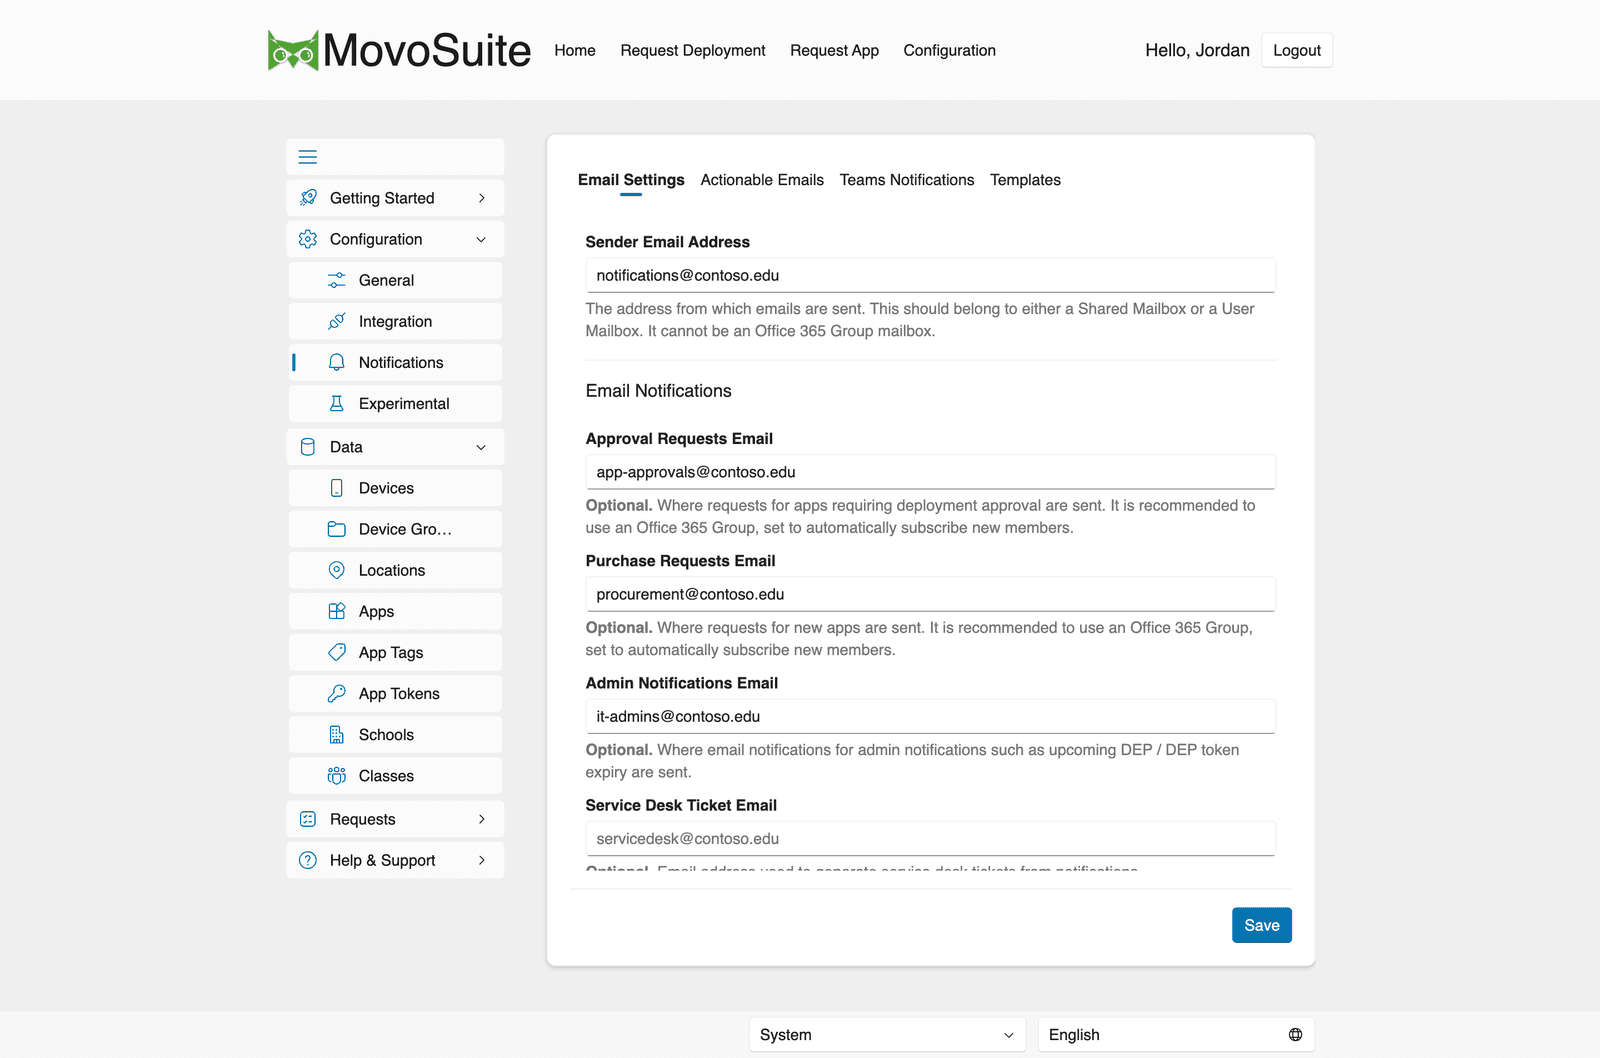
- Sender Email Address — the address emails are sent from. Must be a Shared Mailbox or User Mailbox — not an Office 365 Group mailbox (see Prerequisites).
- Approval Requests Email — where deployment-approval requests go. Recommended: an Office 365 Group set to auto-subscribe members.
- Purchase Requests Email — where new-app (procurement) requests go.
- Admin Notifications Email — where admin alerts (e.g. DEP/VPP token expiry) go.
- Service Desk Ticket Email — address used for service-desk ticket creation. Ticket email is sent whenever this address and Sender Email Address are configured; it is independent of Enable Live Email Notifications.
Actionable Emails
Section titled “Actionable Emails”“Actionable” (live) emails update themselves in Outlook and can carry action buttons. This tab manages the Office 365 Provider ID that establishes that trust.
- Create Provider ID — generates the Provider ID using the details below.
- Enable Live Email Notifications — enables request and status email delivery. When the Provider ID is configured, supported Outlook clients can refresh those emails in place. This switch does not control requester Teams messages, admin Teams/webhook notifications, or service-desk ticket email.
- Configuration for OAM Portal (the values you enter in Microsoft’s Actionable Email
Developer Dashboard):
- Email Address — your sender address.
- Target URL — your MovoSuite backend URL.
- Scope of Submission — Organization.
After creating the ID in the Developer Dashboard, an Exchange/Global Administrator must approve it; then save the Provider ID back into MovoSuite.
Plain HTML approval links are bound to the notification recipient, can be used only once, and expire after 72 hours.
Teams Notifications
Section titled “Teams Notifications”- Enable Teams Bot Notifications for Admins — sends approval and alert notifications
to admin Teams channels. If the requested channel is missing, MovoSuite provisions it
when the backend has
Channel.Create; otherwise it sends to the team’s primary (General) channel. This switch is independent of live email and does not control direct messages to requesters.
Where an approval request appears
Section titled “Where an approval request appears”Approvals are routed by who approves them, so the same switch produces different destinations:
-
Tenant-wide approvals — approvals routed to your global approver always appear in the MovoSuite Admins team channel. They are never sent to a personal chat, even when the requester is also an administrator.
-
Location (delegated) approvals — MovoSuite looks at the approver address configured on the location:
- If it is a team, the request is posted to that team’s Deployment Requests or Purchase Requests channel, and MovoSuite adds itself to the team the first time.
- If it is a group or a single person, the group is expanded and every member gets the request as a direct message from the MovoSuite bot, which installs itself for them on first use.
Location approvals are never posted to the MovoSuite Admins channel — that would show them to, and let them be approved by, people outside the location.
-
Enable Webhook Notifications for Admins — sends approval and alert notifications to configured tenant or location webhooks. This switch is also independent of live email. Either switch, or both switches, can be enabled. Both are enabled by default.
-
Microsoft Teams Configuration — shows whether the MovoSuite bot and the MovoSuite Admins team are configured, with shortcuts to open them in Teams and to Reconfigure Bot / Repair Team. (Both are set up during onboarding.)
- Teams Webhooks — configure URLs for Approval Requests, Purchase Requests, and Admin Notifications. Webhooks can be used instead of, or alongside, the Teams bot. They are one-way and static — no interactive cards or comments.
Existing tenants should re-authorize backend automation after this update to grant
Channel.Create and TeamsAppInstallation.ReadWriteForTeam.All. Without Channel.Create,
notifications still go to General when a named admin channel is missing. Without
TeamsAppInstallation.ReadWriteForTeam.All, MovoSuite cannot add itself to a location
approver’s team, and those approvals are delivered as direct messages instead.
Webhook URLs must use public HTTPS endpoints. MovoSuite rejects embedded credentials and private, loopback, link-local, or otherwise non-public destinations. It also validates resolved addresses when connecting and does not follow redirects.
Which setting controls each channel?
Section titled “Which setting controls each channel?”| Audience and channel | Required settings |
|---|---|
| Requester email | The requester selects email, Enable Live Email Notifications is on, and email authorization is complete. |
| Requester Teams direct message | The requester selects Notify me in Teams and the MovoSuite Teams bot is configured. |
| Tenant-wide approval, Teams | Enable Teams Bot Notifications for Admins is on and the admin Team is configured. MovoSuite restores a missing notification channel when permitted, otherwise it uses General. |
| Location (delegated) approval, Teams | Enable Teams Bot Notifications for Admins is on and the MovoSuite Teams bot is configured. Goes to the approver’s team channel if the approver address is a team, otherwise a direct message to each member. |
| Admin/approver webhook | Enable Webhook Notifications for Admins is on and the applicable webhook URL is configured. |
| Service-desk ticket email | Sender Email Address and Service Desk Ticket Email are configured. |
Templates
Section titled “Templates”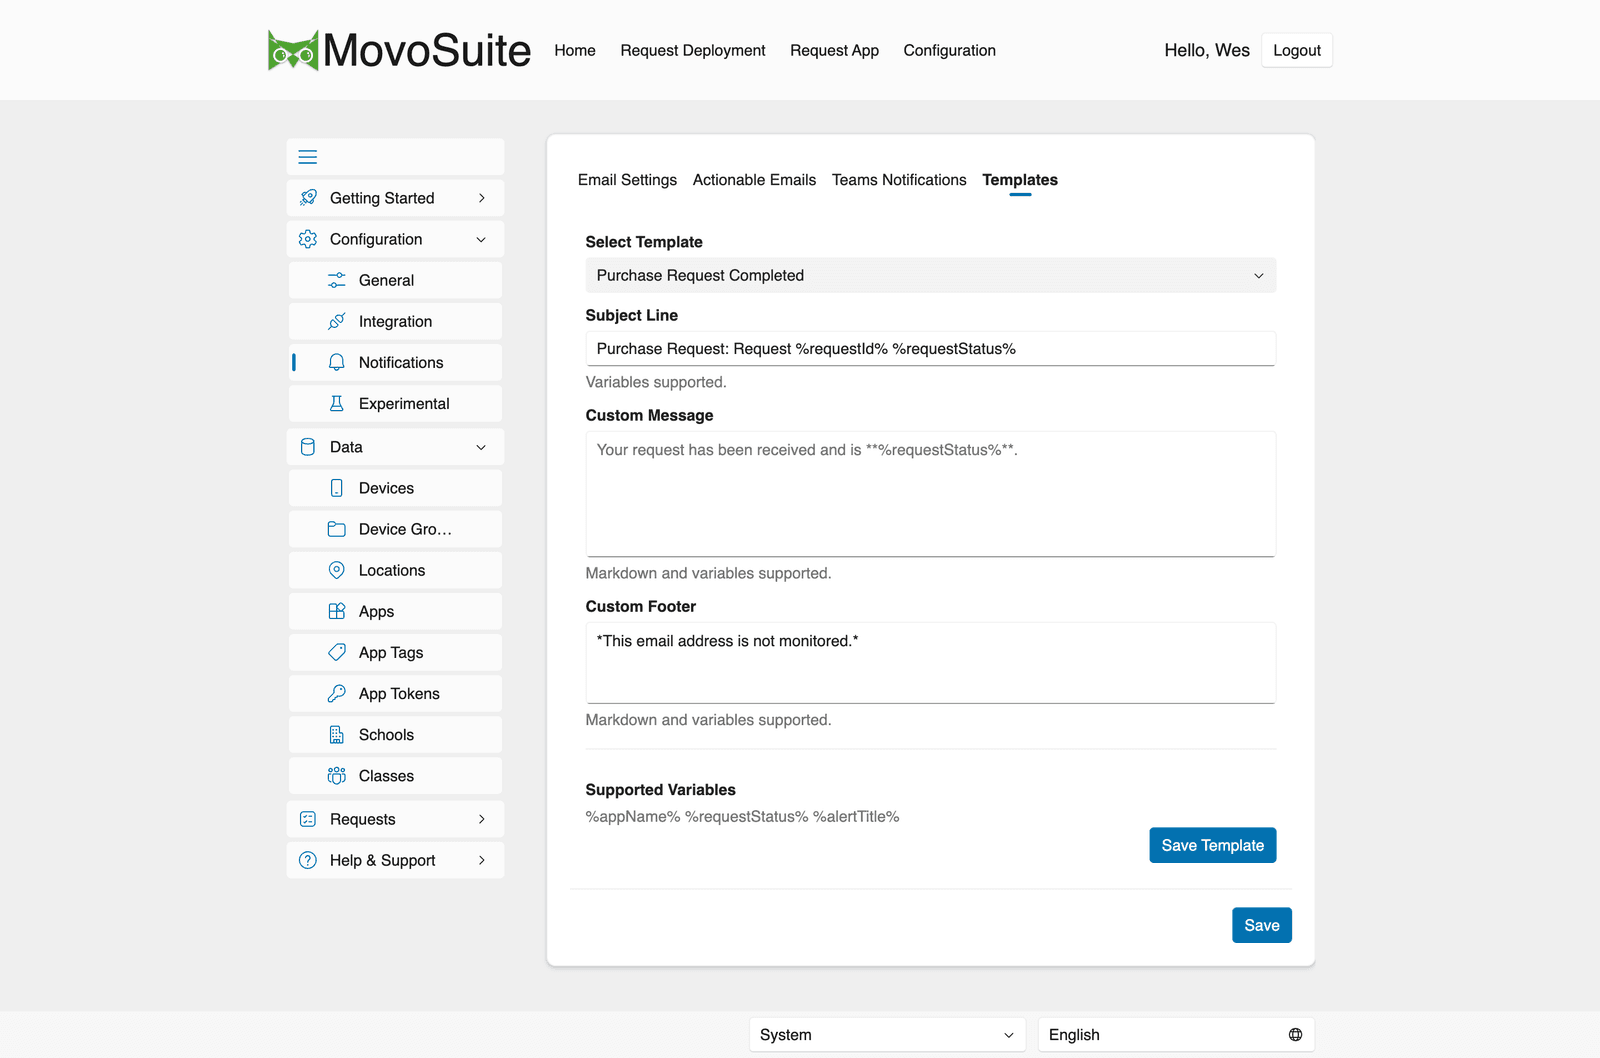
Customize the email sent for each action.
- Select Template — pick the action (e.g. Purchase Request Completed, Deployment Approval Request, Deployment Completed, Deployment Started, App Request Received, Purchase Request Approval).
- Edit the Subject Line, Custom Message (Markdown supported), and Custom Footer.
- Click Save Template.
The supported notification-template variables are exactly: %appName%, %requestId%,
%requestStatus%, %status%, and %title%. (Device-naming tokens like %serial% or
%assetTag% belong to the separate device-naming subsystem and are not valid in
notification templates.)